How to Set Up a WiFi Repeater: A Simple Step-by-Step Guide
In today’s connected world, a strong and stable WiFi signal is essential for everything from work to entertainment. But if you’re facing weak or patchy signals in certain areas of your home or office, a WiFi repeater can be a simple and cost-effective solution. Tin this article we will provide you simple steps to set up a WiFi repeater and improve your wireless coverage in dead zone without a physical cable.
What is a WiFi Repeater?
A WiFi repeater or WIFI extedner or Signal booster all are same only different name. Wifi repeater device connect wirelessly to existing wifi router and provides extend wifi range without connecting any physical lan cable. to boost wifi signal wifi repeater should get atleast 50% of signal from existing wifi router so placement of repeater device also matter while you want to get maximum performance from your extender device.
What You Need Before You Begin
Before setting up your WiFi repeater, make sure you have:
- The SSID (network name) and password of your Existing wifi network.
-
A power outlet near the area where the signal starts to drop
iPad Air vs iPad 10th Gen: Which One Should You Choose?
Method 1: How to Set Up a WiFi Repeater using WPS button
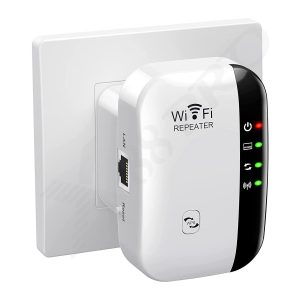
Step 1: Plugin WIFI Repeater to Power Socket
First for setup purpose plugin Repeater device to power socket near your existing wifi router so it can get enough signal for setup.
Step 2: Press WPS button on WIFI Router.
When Repeater LED light start flasing now go to your WiFi router and locate WPS button. Press WPS button for 2 seconds on router and release.
Step 3: Press WPS button on Repeater
Within 2 Minutes of pressing WPS button on Router now press WPS button on WiFI Repeater for 2 seconds and release button.
Repeater device will start flashing and after connection with wifi router Signal LED will Solid.
Step 4 :Relocated WIFI Repeater
Once repeater device connected to main wifi network no unplug repeater and plugin to power socket in the area you facing signal problem. make sure repeater device can get atleast 50% signal from your main wifi router.
Method 2 : Setup WiFi Repeater Usign Login Methods
Step 1: Power On the Repeater
Plug in wifi repeater into a power outlet and wait for few moment until device start flashing LED light.
Step 2: Connect from PC or Mobile
Now Connect LAN cable from Repeater LAN port to PC/Laptop or use default SSID name to connect from Laptop or Mobile.
Step 4: Access the Repeater Setup Page
Open a browser and type the repeater’s default IP address printed on the sticker. Most repeater device using 192.168.0.1 or 192.168.1.1). You may also use a provided web URL like http://myrepeater.net. Enter the login details (usually “admin” for both username and password).
Step 5: Configure the Repeater
After login Choose repeater mode from Modes and wait while Repeater scanning for wifi networks.
-
Select your existing WiFi network from the list
-
Enter your WiFi password
-
Set a name for the repeater’s network (it can be the same as your router’s or different)
Step 6: Reboot and Test
After saving the settings, the wifi repeater will restart. Once restarted, wifi repeater signal LED lgith will be Solid and you can see a New SSID name showing on your Mobile with increase wifi signal range.
Tips for Best Performance
-
Do not place repeater devince under tha table inside box and near thick walls or electronic devices that can interfere with signal
-
Update the repeater’s firmware for better performance and security
-
If your main wifi router support dual band better choose use dual-band repeaters for faster speeds and better coverage
Conclusion
Setting up a WiFi repeater is a straightforward way to improve wireless coverage without the need for complex installations. By following the steps above, you can eliminate dead zones and enjoy a smoother internet experience throughout your space.